Setting Up An Animation Blueprint in Unreal

This tutorial relies on the assumption that you have an Unreal Project witch a Character Blueprint and a Rigged Skeletal Mesh. If you don't have one of your own, a basic 3rd person level build comes with all the required materials.
1)Select Rigged Skeletal Mesh and Create Animation Blueprint

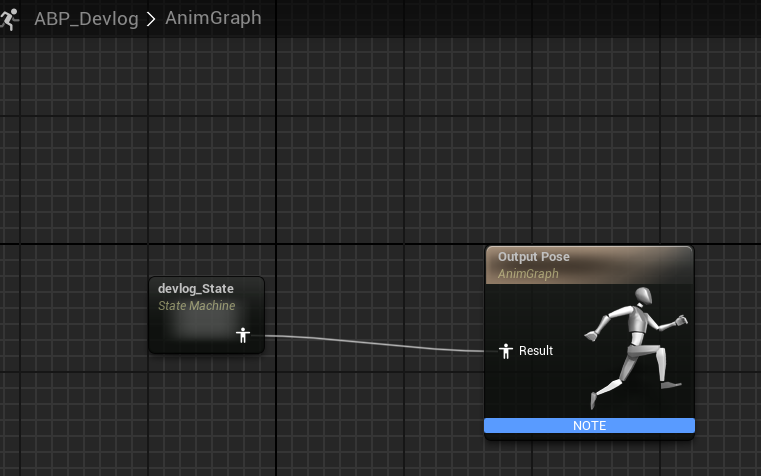
2. In the AnimGraph, Create State Machine. Connect output to Output Pose.
3. Enter State Machine and Add State. Name it idle/walk/run.
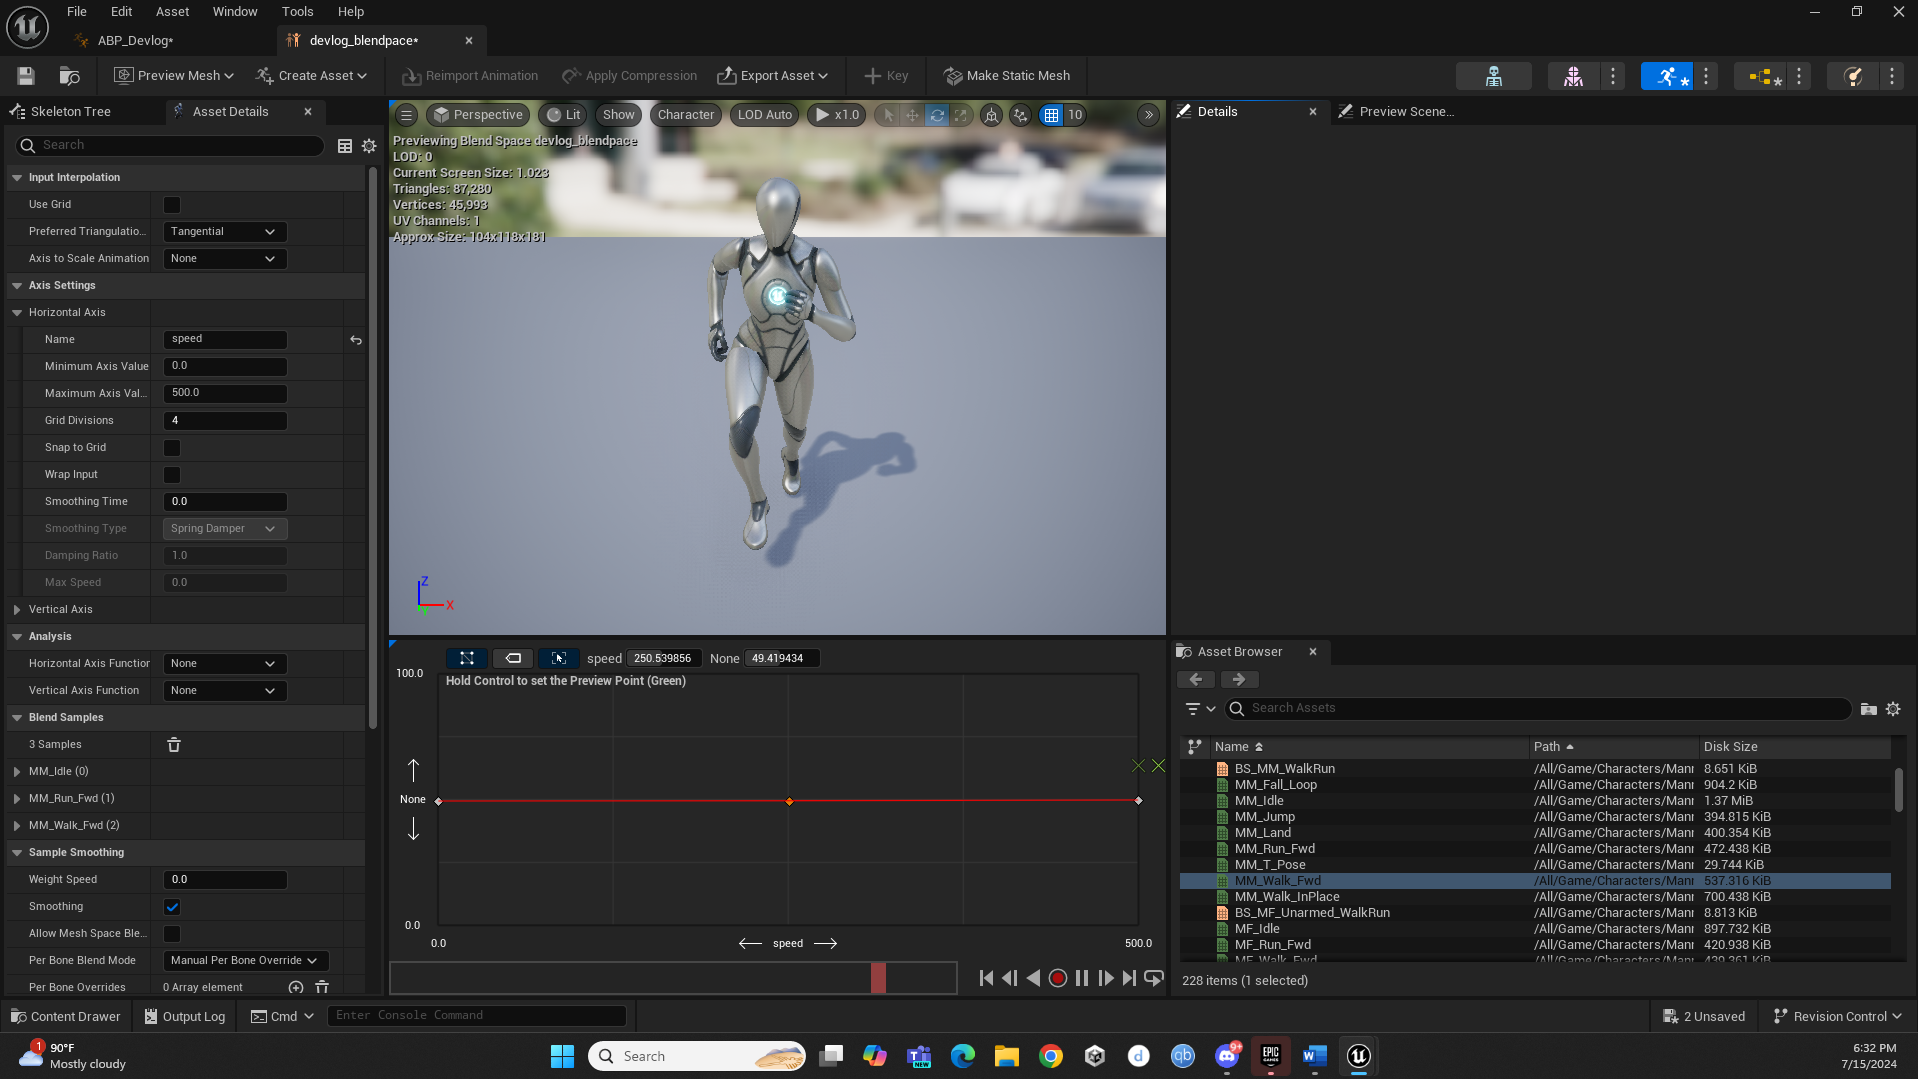
4. From the content drawer, crate a new blendspace
5. Within the blendspace: Assign the x-axis variable as speed and set the minimum speed to zero and the maximum to 500. Place the idle animation at the far left and run at the far right Place the walk in the middle closer to the left as idle should only be triggered when the speed variable input is null. In use cases like Xenex, where the movement is turn based and far from the camera, and where characters are highly stylized, the walk cycle is not vital as the subtlety of the transition from idle to walk to run (vs idle to run) will likely be lost on the player. For use cases where the characters are staged closer to camera and the difference between walking and running has an impact on gameplay, be sure to hit all three stages.
6. Return to the Animation Blueprint idle/walk/run state machine
7. Add the new blendspace and connect it’s output to Output Animation Pose
8. Select the speed node on the blendspace and promote to variable.
9. Go to Event Graph.
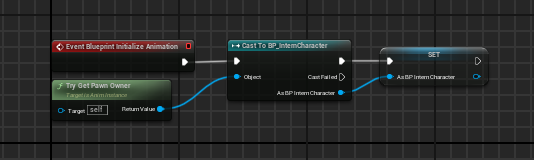
10. Add node Event Blueprint Initialize Animation.
11. Add node Cast To (applicable character blueprint) and connect the output socket of Event Blueprint Initialize Animation and the Return Valuer Socket of Try Get Pawn Owner.
12. Promote the As BP socket to a character variable.
13. Add character variable beneath Event Blueprint Update Animation.
14. From output add Get Velocity node.
15. From output add Vector Length conversion node.
16. Add a Set node for the speed variable and connect its input to Event Blueprint Update Animation output and its speed socket to the Vector Length Return Socket.

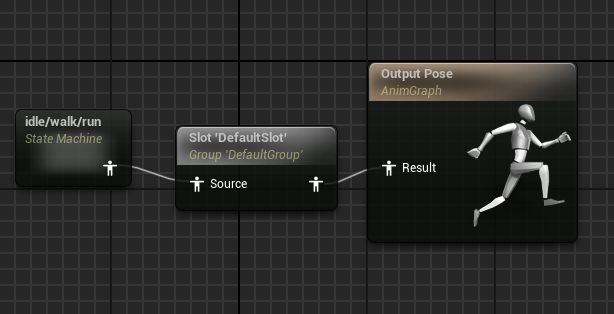
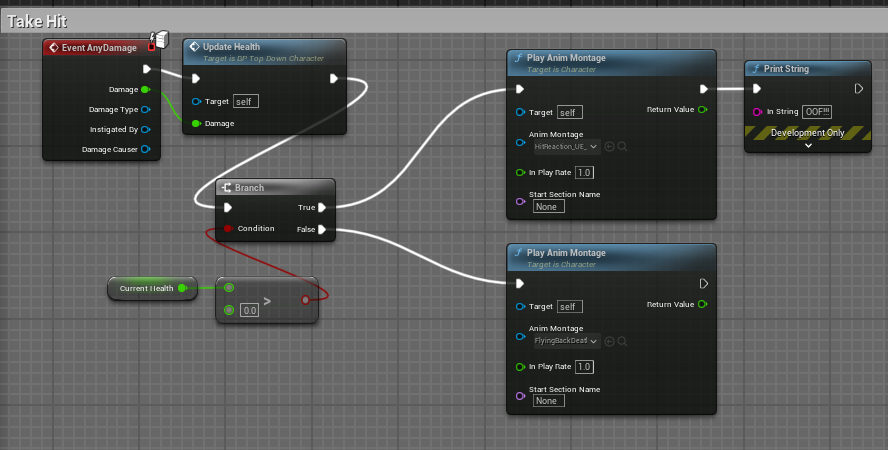
17. Return to AnimGraph and add a Default Slot node between the state machine and the output pose. This will allow you to insert animation montages for events such as attacks, reactions, deaths, and interactions into your character blueprint alongside the code controlling these events.
18. Note the example below where different Animation montages for Hit and Killed are patched directly into the blueprint causality node structure for the characters reaction to an enemy attack.
19. Go to the characters main Blueprint and, under the animation heading, click the Anim Class dropdown and select the animation blueprint you just created. Now you’re character has procedural locomotion animation and the infrastructure to insert new context specific animations.
Leave a comment
Log in with itch.io to leave a comment.